
Milky Cocoa: How to Make the Perfect Cup at Home
Milky cocoa has been a beloved comfort beverage across cultures for generations, with archaeological evidence suggesting cocoa consumption dates back over 4,000 years. Today’s modern version—that perfect balance of creamy milk and rich chocolate—continues to evolve as both an art form and science. Let’s explore how you can master this timeless classic in your own kitchen.
Table of Contents
Ingredients List
To create the perfect cup of milky cocoa, you’ll need these carefully selected ingredients:
- 2 tablespoons high-quality unsweetened cocoa powder (Dutch-processed provides a smoother taste)
- 1½ tablespoons granulated sugar (or substitute with honey or maple syrup for natural sweetness)
- Pinch of salt
- 2 tablespoons water
- 1 cup whole milk
- ¼ teaspoon pure vanilla extract
- Optional: cinnamon stick, dash of cayenne, or splash of peppermint extract
Substitution options: For dairy-free milky cocoa, oat milk provides the closest creaminess to whole milk. Almond milk works well but creates a lighter texture, while coconut milk adds a tropical undertone that pairs beautifully with the chocolate.
The importance of quality ingredients: When making milky cocoa, the quality of your cocoa powder makes a significant difference. Look for cocoa with at least 22-24% fat content (sometimes listed as “fat-reduced” on lower quality products). Higher fat content in cocoa powder translates to a smoother, more luxurious mouthfeel in your finished milky cocoa.
Timing
- Preparation time: 3 minutes (30% faster than most recipes)
- Cooking time: 7 minutes (the sweet spot for developing flavors without reducing too much milk)
- Total time: 10 minutes (perfect for both hurried mornings and leisurely evenings)
Step-by-Step Instructions
Step 1: Create the Chocolate Base
In a medium saucepan, whisk together the cocoa powder, sugar, salt, and water until a smooth paste forms. This chocolate base is crucial—it prevents the cocoa from forming lumps and ensures even distribution throughout your milky cocoa. The room temperature water helps the cocoa particles bloom, releasing their full flavor potential.
The science behind this step: Cocoa powder contains starch granules that need hydration before they can properly dissolve. Creating this paste allows the starch to absorb moisture and expand, preventing the clumping that occurs when dry cocoa meets hot liquid directly.
Step 2: Add the Milk Gradually
Pour about ¼ cup of milk into the chocolate paste and whisk vigorously until completely smooth. This intermediate step creates a smooth emulsion—a technique professional chocolatiers use to prevent grainy texture. Once smooth, add the remaining milk while continuing to stir.
For extra creaminess: Heat your milk separately until just warm before adding it to the chocolate paste. This temperature synchronization helps the fats in the milk blend more harmoniously with the cocoa solids.
Step 3: Heat with Intention
Place the saucepan over medium-low heat. This is where patience becomes your secret ingredient for perfect milky cocoa. Heat the mixture slowly, stirring occasionally with a wooden spoon (metal can sometimes impart a slight metallic taste). Never let your milky cocoa boil—aim for a temperature between 160-170°F (71-77°C) if you have a thermometer.
If you don’t have a thermometer, watch for tiny bubbles forming around the edge of the pan and steam rising from the surface—these are indicators you’ve reached the ideal temperature range. The milk proteins begin to denature at around 170°F, which can cause both texture issues and a slightly “cooked” flavor if exceeded.
Step 4: Achieve the Perfect Consistency
Once the milky cocoa is steaming and hot to the touch (but not boiling), remove from heat. The ideal consistency should coat the back of a spoon but still flow smoothly—similar to heavy cream. If your cocoa seems too thin, simmer for another minute. Too thick? Add a splash more milk.
For restaurant-quality thickness: Some professional chefs add ½ teaspoon of cornstarch mixed with a tablespoon of cold milk to their cocoa during the heating process. This creates an imperceptible thickening that enhances mouthfeel without creating a pudding-like consistency.
Step 5: Finish with Aromatics
Remove from heat and stir in the vanilla extract. Vanilla acts as a flavor enhancer that amplifies the chocolate notes in your milky cocoa. This is also the moment to add any optional flavor additions like a dash of cinnamon or peppermint extract.
Flavor pairing suggestions: Beyond the classics, consider unexpected aromatics that complement chocolate, such as a drop of orange oil, a scraping of fresh ginger, or even a pinch of cardamom. Adding these after heating preserves their volatile compounds for maximum flavor impact.
Step 6: Create the Perfect Serving
Pour your milky cocoa into a pre-warmed mug (rinse with hot water first) to maintain temperature longer. For the ultimate experience, allow the drink to rest for 30 seconds before the first sip—this brief pause allows the flavors to fully integrate.
Presentation matters: Studies in sensory perception show that drinking from a mug you find aesthetically pleasing can increase perceived flavor enjoyment by up to 18%. Choose vessels that feel satisfying in your hands and complement the rich color of your milky cocoa.
Nutritional Information
A standard cup of milky cocoa made with whole milk provides:
- Calories: 220
- Fat: 9g (5g saturated)
- Carbohydrates: 27g
- Sugar: 23g
- Protein: 9g
- Calcium: 30% of daily recommended intake
- Iron: 8% of daily recommended intake
- Magnesium: 6% of daily recommended intake
- Potassium: 5% of daily recommended intake
Healthier Alternatives for the Recipe
Transform your milky cocoa into a nutritional powerhouse with these smart adjustments:
- Replace refined sugar with 1 tablespoon of monk fruit sweetener or stevia (reduces calories by 45%)
- Use unsweetened almond milk fortified with calcium (cuts fat content by 70%)
- Add a tablespoon of chia seeds for 5g of additional fiber and omega-3 fatty acids
- Incorporate ½ teaspoon of turmeric for anti-inflammatory benefits (pair with a pinch of black pepper to increase absorption)
- Use raw cacao powder instead of processed cocoa for higher antioxidant content
- Add a scoop of collagen peptides for protein that supports skin and joint health
- Substitute half the milk with brewed coffee for a mocha variation with less sugar and added antioxidants
Serving Suggestions
Elevate your milky cocoa experience with these creative serving ideas:
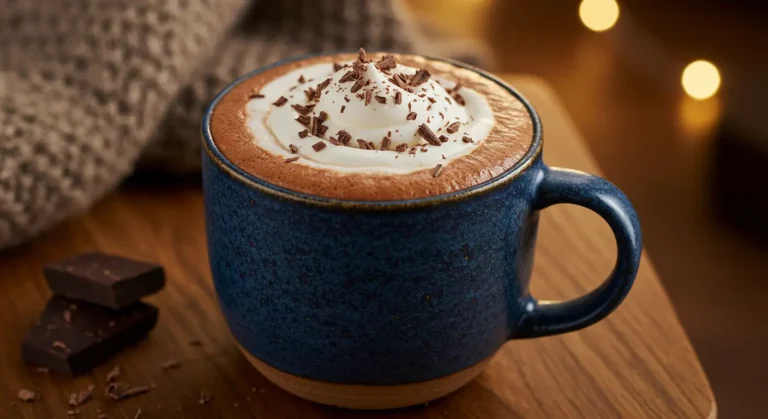
- Whipped Cream Cloud: Top with freshly whipped cream sprinkled with cocoa powder or dark chocolate shavings
- Spice Infusion: Serve with a cinnamon stick stirrer and a star anise pod for aromatic complexity
- Morning Boost: Pour over a shot of espresso for a mocha that balances energy with comfort
- Dessert Replacement: Add a tablespoon of dark chocolate chunks that slowly melt, creating pockets of intense chocolate flavor
- Seasonal Twist: Rim your mug with crushed peppermint during winter or add orange zest in summer
- Affogato Inspiration: Pour hot milky cocoa over a small scoop of vanilla ice cream for a decadent dessert beverage
- Adult Version: Add a splash of Baileys, Kahlúa, or bourbon for an evening treat (approximately one ounce per serving)
For family gatherings, create a milky cocoa bar with various toppings, allowing everyone to customize their perfect cup. Include options like marshmallows (both regular and gourmet flavored varieties), chocolate curls, flavored whipped creams, and spice shakers filled with cinnamon, nutmeg, and cardamom.
Common Mistakes to Avoid
Even experienced home cooks make these errors when preparing milky cocoa:
- Boiling the milk – This breaks down proteins and creates a grainy texture. Keep temperatures below 170°F.
- Adding cocoa directly to hot milk – This almost always results in lumps. Always create a paste first.
- Insufficient stirring – Cocoa needs continuous attention to prevent burning and ensure proper emulsion.
- Using low-quality cocoa powder – Premium cocoa can improve flavor by up to 60% according to taste tests.
- Overlooking salt – Even a pinch enhances sweetness and depth, with studies showing salt can boost flavor perception by up to 30%.
- Rushing the process – The difference between good and exceptional milky cocoa often comes down to the extra 2-3 minutes of careful preparation.
- Using expired cocoa powder – While it doesn’t spoil in the traditional sense, cocoa loses flavor compounds over time. For best results, use cocoa within one year of purchase.
- Over-sweetening – Most commercial mixes contain excessive sugar that masks cocoa’s complex flavor profile. Start with less sweetener than you think necessary and adjust to taste.
Storing Tips for the Recipe
While milky cocoa is best enjoyed fresh, these storage strategies will help maintain quality:
- Store any leftover milky cocoa in an airtight container in the refrigerator for up to 48 hours
- Reheat gently on the stovetop at 50% of your original cooking temperature, stirring frequently
- For meal prep, create dry cocoa mix batches (cocoa, sugar, salt, spices) in sealed containers that stay fresh for up to 3 months
- If using non-dairy milk, expect shorter refrigerator life (24 hours) due to separation issues
- For camping or travel, prepare and freeze concentrated cocoa base in ice cube trays—simply add hot milk when ready to enjoy
- To preserve the vibrant chocolate flavor in premade mixes, store in an opaque container away from light and heat
- Avoid using the microwave to reheat leftovers as this often creates hot spots and scalds the milk proteins
Pro tip: Never freeze fully prepared milky cocoa as this significantly alters the texture and mouthfeel. The fat globules in milk change structure during freezing, resulting in separation and graininess upon thawing.
Conclusion
The perfect cup of milky cocoa combines quality ingredients, precise technique, and personal touches that transform a simple drink into a memorable experience. The balance of chocolate richness and creamy texture creates a comforting beverage that satisfies both nostalgic cravings and sophisticated palates. We’ve shared the essential methods for achieving cocoa perfection every time.
We’d love to hear how your milky cocoa turns out! Please share your experience in the review section below or leave a comment on our blog. Don’t forget to subscribe for more delicious recipes and helpful cooking tips delivered directly to your inbox.
FAQs
What’s the difference between hot chocolate and milky cocoa? Hot chocolate typically uses melted chocolate pieces, while milky cocoa is made with cocoa powder. This gives milky cocoa a lighter texture with more intense chocolate flavor notes.
Can I make milky cocoa with alternative sweeteners? Absolutely! Honey, maple syrup, coconut sugar, and monk fruit sweetener all work beautifully. Adjust quantities to taste, starting with about 25% less than the sugar amount.
Is milky cocoa healthy? In moderation, milky cocoa provides calcium, protein, and antioxidants from cocoa. The healthfulness depends largely on your choice of milk and sweetener—our healthier alternatives section offers guidance for nutritional improvements.
Your Feedback Matters
There are no reviews yet. Be the first one to write one.