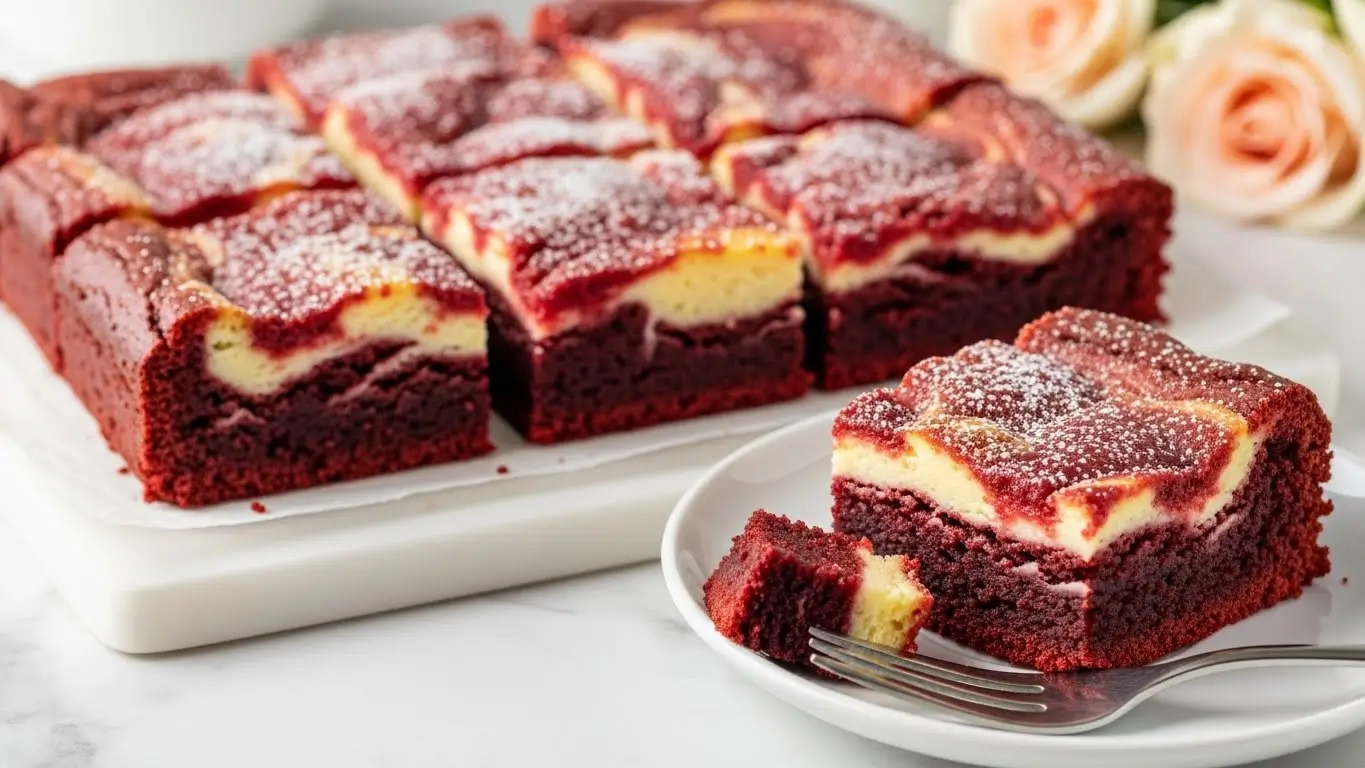
Red Velvet Brownie – Valentine Dessert Everyone Loves
What transforms ordinary chocolate brownies into the most requested Valentine’s Day treat that combines visual drama with irresistible flavor? The secret lies in marrying the fudgy richness of classic brownies with the distinctive cocoa-buttermilk tang of red velvet cake, creating something entirely new and utterly addictive. The red velvet brownie delivers stunning ruby-colored squares with a dense, moist crumb that melts on your tongue while cream cheese swirls add luxurious tanginess. This red velvet brownie recipe captures hearts with its vibrant appearance and complex flavor profile that goes beyond simple chocolate.
Table of Contents
Ingredients List
For this red velvet brownie you’ll need:
- 1 cup unsalted butter, melted
- 2 cups granulated sugar
- 4 large eggs
- 1 1/2 cups all-purpose flour
- 1/3 cup cocoa powder
- 1 teaspoon salt
- 1 teaspoon vanilla extract
- 2 tablespoons red food coloring
- 1 teaspoon white vinegar
- 8 ounces cream cheese, softened
- 1/3 cup powdered sugar
- 1 egg yolk
- 1/2 teaspoon vanilla extract
Timing
This red velvet brownie requires:
- Preparation time: 20 minutes
- Baking time: 35 minutes
- Cooling time: 1 hour
- Total time: 1 hour 55 minutes
Step-by-Step Instructions
Step 1: Prepare the Pan and Preheat
Preheat your oven to 350°F and position the rack in the center for even heat distribution. Line a 9×13 inch baking pan with parchment paper, leaving overhang on two sides to create handles for easy removal later. Lightly grease the parchment with butter or cooking spray to prevent sticking. Proper pan preparation is crucial for cleanly removing your finished red velvet brownie without breaking the delicate texture. The parchment sling method makes serving neat, professional-looking squares effortless.
Step 2: Mix the Brownie Batter
In a large mixing bowl, whisk together melted butter and granulated sugar until well combined and slightly lightened in color. Add eggs one at a time, beating well after each addition until the mixture becomes thick and glossy. Stir in vanilla extract, red food coloring, and white vinegar—the vinegar reacts with cocoa to enhance the red color and create that signature red velvet tang. In a separate bowl, sift together flour, cocoa powder, and salt. Gradually fold the dry ingredients into the wet mixture using a spatula, stirring just until no flour streaks remain. Overmixing develops gluten and creates tough brownies instead of the fudgy texture you want.
Step 3: Create the Cream Cheese Swirl
In a medium bowl, beat the softened cream cheese with powdered sugar until completely smooth and creamy with no lumps. Add the egg yolk and vanilla extract, mixing until fully incorporated. The cream cheese mixture should be silky and spreadable but thick enough to hold its shape when swirled. This tangy, sweet layer provides both visual appeal and flavor contrast against the chocolate base of your red velvet brownie. Ensure the cream cheese is at room temperature for the smoothest mixing.
Step 4: Layer and Swirl
Pour the red velvet brownie batter into the prepared pan, spreading it evenly with a spatula to reach all corners. Drop spoonfuls of the cream cheese mixture across the surface of the brownie batter in a random pattern. Using a butter knife or wooden skewer, gently swirl the cream cheese through the batter in figure-eight or zigzag motions. Don’t overmix—you want distinct cream cheese ribbons visible throughout rather than a uniform pink color. The marbled effect creates the gorgeous visual appeal that makes these brownies so Instagram-worthy.
Step 5: Bake and Cool
Place the pan in the preheated oven and bake for 33-37 minutes. The brownies are done when a toothpick inserted in the center comes out with a few moist crumbs but not wet batter. The edges should look set while the center still appears slightly soft—it will continue cooking as it cools. Remove from the oven and let cool completely in the pan on a wire rack for at least one hour. Cutting warm brownies creates messy, crumbly squares instead of the neat portions you want. Once cool, lift the parchment handles to remove the entire brownie slab, then cut into squares using a sharp knife wiped clean between cuts.
Nutritional Information
For a serving of this red velvet brownie (this recipe serves 16 people):
- Calories: 315
- Total Fat: 16g
- Saturated Fat: 10g
- Cholesterol: 95mg
- Sodium: 220mg
- Total Carbohydrates: 40g
- Dietary Fiber: 1g
- Sugars: 32g
- Protein: 4g
- Calcium: 45mg
- Iron: 1mg
- Vitamin A: 520 IU
Healthier Alternatives for the Recipe
Transform your red velvet brownie into a healthier version with these modifications:
- Greek Yogurt Replacement: Substitute half the butter with plain Greek yogurt to reduce fat while adding protein and maintaining moisture
- Coconut Sugar: Replace granulated sugar with coconut sugar for a lower glycemic index option with trace minerals
- Whole Wheat Pastry Flour: Use whole wheat pastry flour instead of all-purpose for increased fiber without sacrificing tender texture
- Natural Food Coloring: Switch to beet powder or natural red food coloring to avoid artificial dyes and add antioxidants
- Reduced Sugar: Cut the sugar by one-quarter and add extra vanilla extract to maintain perceived sweetness
- Neufchatel Cheese: Use Neufchatel instead of regular cream cheese to lower fat content by approximately one-third
- Applesauce Addition: Replace up to half the butter with unsweetened applesauce for fewer calories and added moisture
Serving Suggestions
Elevate your red velvet brownie experience with these ideas:
- Serve warm with a scoop of vanilla ice cream or whipped cream for an indulgent Valentine’s treat
- Dust with powdered sugar just before serving to create an elegant, snowy effect that enhances presentation
- Drizzle with white chocolate ganache or cream cheese frosting for extra decadence and visual appeal
- Cut into heart shapes using cookie cutters for Valentine’s Day parties or romantic occasions
- Stack two brownie squares with fresh raspberries and whipped cream between layers for a sophisticated plated option
- Pair with freshly brewed coffee or a glass of cold milk that complements the rich chocolate flavors
- Package individual brownies in clear cellophane bags tied with ribbon for thoughtful homemade gifts
Common Mistakes to Avoid
Master this red velvet brownie by avoiding these pitfalls:
- Overmixing the Batter: Stirring too vigorously after adding flour develops gluten, creating tough, cake-like brownies instead of fudgy ones
- Skipping the Vinegar: Omitting vinegar eliminates the chemical reaction that enhances red color and creates authentic red velvet tang
- Cold Cream Cheese: Using cold cream cheese creates lumpy filling that won’t swirl smoothly—always bring to room temperature first
- Overbaking: Baking until completely set in the center produces dry, crumbly brownies—remove when slightly underdone for fudgy texture
- Cutting Too Soon: Slicing warm brownies results in messy, uneven squares that stick to the knife and fall apart
- Too Much Swirling: Over-swirling blends the cream cheese completely into the batter, losing the beautiful marbled effect
- Wrong Pan Size: Using a different pan size than specified changes baking time and brownie thickness significantly
Storing Tips for the Recipe
Preserve the freshness of your red velvet brownie with these strategies:
- Room Temperature Storage: Keep brownies in an airtight container at room temperature for up to 3 days for optimal texture
- Refrigerator Method: Store in the refrigerator for up to one week, bringing to room temperature before serving for best flavor
- Freezing Instructions: Wrap individual brownies tightly in plastic wrap, then place in freezer bags for up to 3 months of storage
- Layer Separation: Place parchment paper between brownie layers in storage containers to prevent sticking and maintain neat edges
- Avoid Moisture: Don’t store brownies in containers while still warm as condensation creates sogginess
- Thawing Process: Thaw frozen brownies overnight in the refrigerator, then bring to room temperature for 30 minutes before serving
- Make-Ahead Strategy: Bake brownies up to 2 days ahead and store covered at room temperature for party convenience
Conclusion
Red velvet brownies combine stunning color with fudgy texture and tangy cream cheese swirls. This Valentine’s favorite delivers impressive results with straightforward techniques that any baker can master for special occasions.
Ready to bake something unforgettable? Try this red velvet brownie recipe and share your results in the review section below. Leave a comment on our blog with your favorite ways to serve these beautiful treats!
FAQs
Can I make red velvet brownies without food coloring? Yes, though they’ll be dark brown instead of red. Use natural beet powder for a subtle reddish hue without artificial dyes, though the color won’t be as vibrant.
Why do my brownies turn out cake-like instead of fudgy? This usually means overbaking or overmixing. Remove brownies when slightly underdone and fold the batter gently after adding flour to maintain dense texture.
Can I skip the cream cheese swirl? You can, but the cream cheese adds signature tanginess and visual appeal. Without it, you’ll have chocolate brownies rather than true red velvet brownies.
How do I get clean brownie cuts? Let brownies cool completely, use a sharp knife, and wipe the blade clean with a damp cloth between each cut for neat, professional-looking squares.
Can I make these brownies gluten-free? Yes! Use a 1:1 gluten-free flour blend designed for baking. The texture may be slightly different but still delicious.
What if I don’t have buttermilk? This recipe doesn’t require buttermilk. The vinegar and cocoa create the signature red velvet tang without traditional buttermilk ingredients.
Your Feedback Matters
There are no reviews yet. Be the first one to write one.