
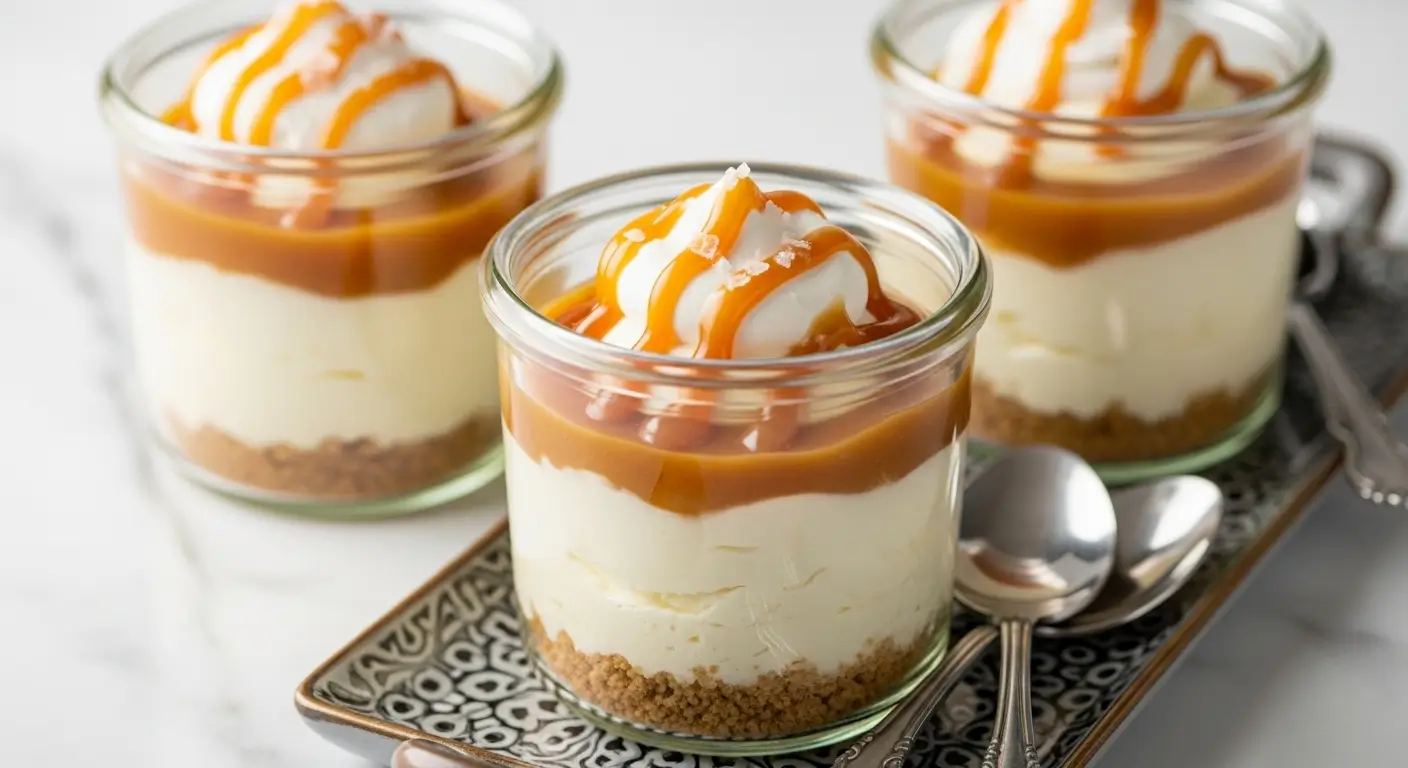
Salted Caramel Cheesecake Cups – The Best Mini Dessert
What makes one elegant dessert deliver restaurant-quality presentation while combining sweet-salty complexity and creamy indulgence without requiring oven time or cheesecake water bath expertise? The answer emerges in layering graham cracker crust with silky cream cheese filling that creates the salted caramel cheesecake cups, transforming individual servings into sophisticated treat. This no bake dessert recipe proves that impressive entertaining becomes achievable when proper chilling meets quality ingredients and portioned presentation. The salted caramel cheesecake cups deliver perfect harmony where buttery crust meets tangy filling and glossy caramel, allowing each component to contribute distinct texture and flavor that creates memorable dessert suitable for dinner parties, special occasions, or elegant gatherings year-round.
Table of Contents
Ingredients List
For this salted caramel cheesecake cups you’ll need cream cheese, graham crackers, caramel sauce, and flaky sea salt that creates luxurious individual desserts with impressive presentation and sophisticated flavor.
For the Graham Cracker Crust:
- 1 1/2 cups graham cracker crumbs (about 10 crackers)
- 1/4 cup granulated sugar
- 6 tablespoons unsalted butter, melted
- Pinch of salt
For the Cheesecake Filling:
- 16 ounces cream cheese, softened to room temperature
- 1/2 cup granulated sugar
- 1/4 cup sour cream
- 2 teaspoons vanilla extract
- 1 tablespoon fresh lemon juice
- 1 cup heavy whipping cream, cold
For the Salted Caramel:
- 1 cup granulated sugar
- 6 tablespoons unsalted butter, cubed
- 1/2 cup heavy cream, room temperature
- 1 teaspoon vanilla extract
- 3/4 teaspoon flaky sea salt, plus extra for topping
For Assembly:
- Whipped cream for topping
- Extra caramel for drizzling
- Flaky sea salt for finishing
Timing
This salted caramel cheesecake cups requires minimal active preparation with most time devoted to chilling for proper setting and sliceable consistency:
- Prep time: 30 minutes
- Chilling time: 4 hours minimum
- Total time: 4 hours 30 minutes
Step-by-Step Instructions
Step 1: Make Graham Cracker Crust
Combine graham cracker crumbs, sugar, melted butter, and salt in bowl until mixture resembles wet sand. Divide evenly among 8-10 small glasses or jars, pressing firmly into bottom with spoon or small glass. Refrigerate while preparing filling. Firm compression creates stable base that won’t crumble when eating your salted caramel cheesecake cups.
Step 2: Prepare Cheesecake Filling
Beat softened cream cheese and sugar in large bowl with electric mixer until smooth and fluffy, about 2-3 minutes. Add sour cream, vanilla extract, and lemon juice, beating until completely incorporated. Proper beating eliminates lumps and creates silky texture essential for premium cheesecake filling.
Step 3: Whip and Fold Cream
In separate bowl, whip cold heavy cream to stiff peaks using clean beaters. Gently fold whipped cream into cream cheese mixture in three additions, maintaining volume and creating light, airy texture. Careful folding prevents deflating cream while ensuring even distribution throughout your salted caramel cheesecake cups filling.
Step 4: Make Salted Caramel Sauce
Heat sugar in heavy saucepan over medium heat, stirring constantly until melted and amber colored. Carefully whisk in butter until incorporated, then slowly add room temperature cream while whisking continuously. Remove from heat and stir in vanilla and sea salt. Cool completely before using. Proper temperature prevents caramel from melting filling layers.
Step 5: Assemble and Chill
Spoon or pipe cheesecake filling over chilled crusts in glasses, smoothing tops. Drizzle cooled salted caramel over filling, reserving some for serving. Cover and refrigerate at least 4 hours or overnight until set. Before serving, top with whipped cream, extra caramel drizzle, and sprinkle of flaky sea salt. Adequate chilling ensures filling sets properly for clean eating experience in your salted caramel cheesecake cups.
Nutritional Information
For a serving of this salted caramel cheesecake cups, you’ll receive indulgent dessert perfect for special occasions with rich flavors and satisfying portions:
- Calories: 485 per cup
- Carbohydrates: 46g
- Total sugars: 38g
- Dietary fiber: 0g
- Protein: 5g
- Total fat: 32g
- Saturated fat: 19g
- Cholesterol: 95mg
- Sodium: 385mg
- Potassium: 125mg
- Calcium: 8% daily value
- Vitamin A: 18% daily value
- Iron: 4% daily value
Healthier Alternatives for the Recipe
Transform your salted caramel cheesecake cups into a healthier version with these modifications that reduce calories and sugar while maintaining creamy texture and sweet-salty balance:
- Reduced-fat cream cheese: Use Neufchâtel or light cream cheese to cut saturated fat and calories significantly
- Greek yogurt addition: Replace half the cream cheese with Greek yogurt for protein boost and tangy flavor
- Coconut sugar: Use coconut sugar in filling for lower glycemic sweetener with mineral content
- Date caramel: Make caramel from blended dates and almond butter for refined sugar-free option
- Graham alternatives: Use crushed nuts or oat-based crust for gluten-free, nutrient-dense base
- Portion control: Use smaller glasses for built-in serving size control and reduced calorie intake
- Whipped topping reduction: Use minimal whipped cream garnish or skip entirely for fewer calories
- Monk fruit sweetener: Replace granulated sugar with monk fruit for zero-calorie sweetness
Serving Suggestions
Elevate your salted caramel cheesecake cups experience with these ideas that transform individual desserts into impressive finale for various dining occasions:
- Present on dessert tray with small spoons for elegant dinner party presentation
- Garnish with crushed toffee or caramel pieces for additional textural contrast
- Add chocolate shavings or cocoa powder dusting for mocha-caramel variation
- Serve with espresso or dessert wine for sophisticated pairing
- Layer with crushed pretzels for extra salty crunch and unique twist
- Top with fresh berries for color contrast and tartness to balance sweetness
- Drizzle with dark chocolate sauce alongside caramel for decadent combination
- Present in vintage glassware or mason jars for rustic-chic aesthetic
Common Mistakes to Avoid
Master this salted caramel cheesecake cups by avoiding these pitfalls that compromise texture, presentation, and overall dessert quality:
- Using cold cream cheese: Room temperature cream cheese blends smoothly while cold creates lumps and uneven texture
- Overbeating after adding cream: Excessive mixing deflates whipped cream and creates dense filling instead of light, airy consistency
- Hot caramel addition: Warm caramel melts filling and creates runny mess instead of distinct layers in salted caramel cheesecake cups
- Insufficient chilling: Less than 4 hours prevents proper setting and creates soupy texture when serving
- Wrong sugar technique: Stirring sugar before it melts creates crystallization and grainy caramel instead of smooth sauce
- Loose crust: Inadequate pressing creates crumbly base that falls apart instead of holding together when eating
- Cold cream in caramel: Temperature shock causes caramel to seize and creates grainy texture instead of silky consistency
Storing Tips for the Recipe
Preserve the freshness of your salted caramel cheesecake cups with these strategies that maintain texture and prevent moisture issues for extended enjoyment:
- Refrigerator storage: Keep covered tightly in refrigerator for up to 5 days for optimal freshness
- Individual covering: Cover each cup with plastic wrap pressed directly on surface to prevent skin formation
- Freezer option: Freeze without whipped cream topping for up to 1 month, thawing overnight in refrigerator
- Caramel separation: Store extra caramel sauce separately and add fresh when serving for best texture
- Make-ahead timing: Prepare up to 2 days ahead, adding final garnishes just before serving
- Moisture prevention: Avoid leaving uncovered as filling absorbs refrigerator odors and dries out edges
- Transport tip: Keep chilled until serving time and transport in cooler for outdoor events or potlucks
Conclusion
This salted caramel cheesecake cups combines creamy filling with buttery crust and glossy caramel, creating elegant desserts through careful layering and proper chilling. The recipe proves that impressive entertaining becomes simple when quality ingredients meet portioned presentation. Whether hosting dinner party or celebrating special occasion, these individual treats add sophisticated element that delivers restaurant-quality results with convenient no-bake preparation.
Ready to impress your guests with elegant dessert? Try these salted caramel cheesecake cups today and share your experience in the comments below. We’d love to hear how this became your go-to entertaining dessert or what creative variations you discovered!
FAQs
Can I make salted caramel cheesecake cups without homemade caramel? Yes, use high-quality store-bought caramel sauce and add extra flaky sea salt for similar sweet-salty balance.
What can I substitute for graham crackers? Use crushed vanilla wafers, gingersnaps, or Oreo cookies for different flavor profiles in crust base.
How do I prevent lumpy cream cheese filling? Ensure cream cheese reaches room temperature and beat thoroughly before adding other ingredients for smooth consistency.
Can I make these ahead of time? Yes, prepare completely up to 2 days ahead and refrigerate covered, adding whipped cream garnish just before serving.
What size cups should I use? Use 6-8 ounce glasses, jars, or ramekins for ideal serving portions that balance all components properly.
Why didn’t my filling set? Insufficient chilling time or overbeating deflated whipped cream; ensure 4+ hours refrigeration and gentle folding technique.
Can I make this dairy-free? Yes, use dairy-free cream cheese, coconut cream, and coconut oil for completely plant-based version with similar richness.
How do I get caramel to amber color? Heat sugar patiently over medium heat, stirring constantly once it begins melting to prevent burning while achieving deep color.
Your Feedback Matters
There are no reviews yet. Be the first one to write one.


One Comment
Comments are closed.